
We offer two options for returning an eForce tool for service or repair:
- the tool is not functioning correctly.
- eForce Crimping Tool Service/Calibration, if the tool is
due for service , indicated by its LED status lights.
If you are unsure, you can contact us at This email address is being protected from spambots. You need JavaScript enabled to view it. for help.
For either return method, we ask that you provide as much information about the tool as possible. This includes:
- What die has been used in the tool
- What the tool has been used to crimp
- How well it has been crimping
- Status lights of the tool, if any
- Date of purchase (have proof ready, in case we request it)
References and Meanings:
LED Display Reference
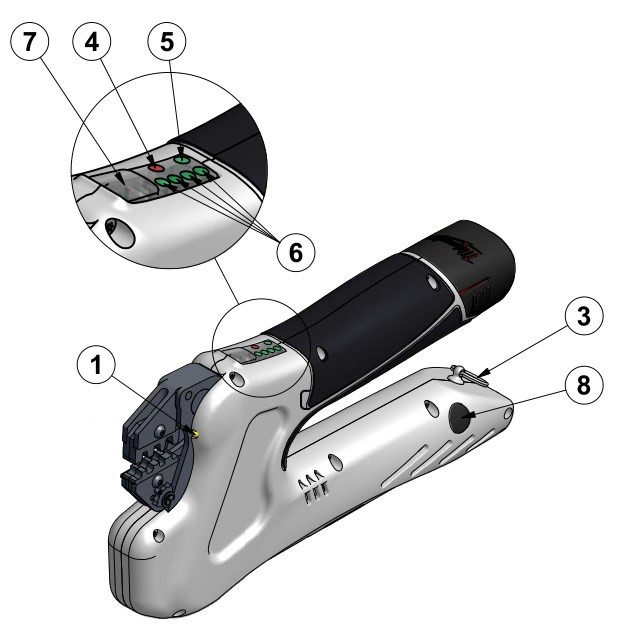
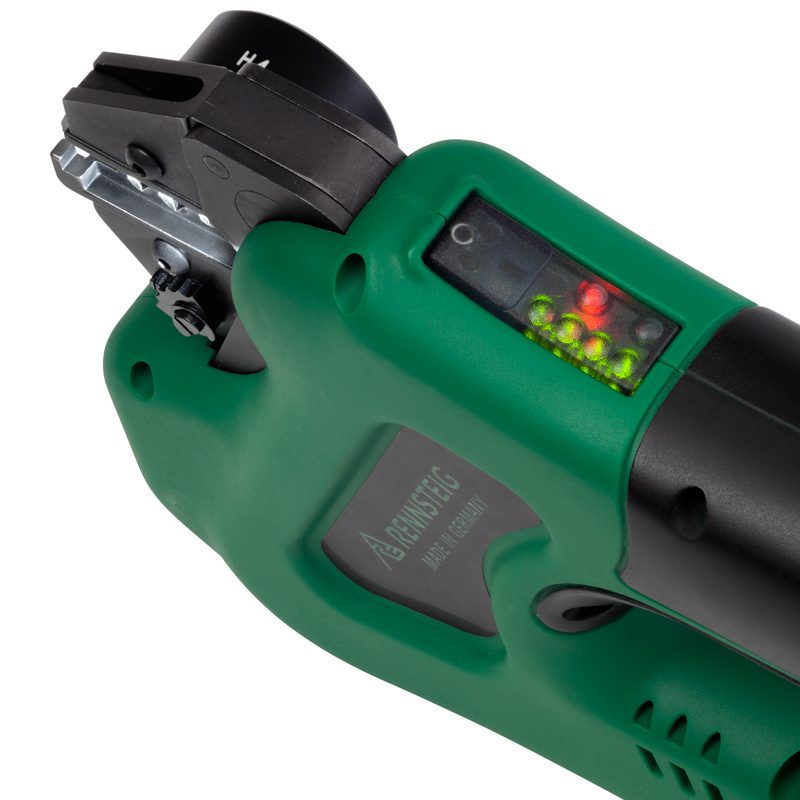
| Diagram and photo showing status LEDs on the eForce Tool referred to in this section: Red LED (4), Green LED (5), Indicator LEDs (6) | |
|---|---|
 |
 |
The following table lists possible states of the eForce tool’s status LEDs, and their meanings.
| Description | Status LEDs | Tool Status |
|---|---|---|
| Green LED: Off Indicator LEDs: Off Red LED: Off |
 |
Tool is powered off |
| Green LED: On Indicator LEDs: Don’t Care Red LED: Off |
 |
Tool is ready for use |
| Green LED: Off Indicator LEDs: Don’t Care Red LED:Off |
 |
Tool is returning jaws to starting position |
| Green LED: Flashing Indicator LEDs: Off Red LED: Off |
 |
Low battery – recharge or replace required |
| Green LED: Don’t Care Indicator LEDs:Vary with battery Red LED: Off |
    |
Battery charge level indicator (4 = fully charged, 1 = low) |
| Green LED: Don’t Care Indicator LEDs: Don’t Care Red LED: Flashing |
 |
Tool is outside of operating temperature range (-10°C to 50°C) |
| Green LED: Don’t Care Indicator LEDs: Don’t Care Red LED: On |
 |
Excessive current draw detected; overcurrent protection triggered. If fault persists after checking die sets/crimp contacts and cleaning, return to service center. |
| Green LED: Flashing Indicator LEDs: Off Red LED: Flashing alternately |
  |
Maintenance interval of 25,000 crimps reached, return to service center. |
| Green LED: Flashing Indicator LEDs: Flashing Red LED: On |
 |
Tool has detected malfunction, return to service center. |
How to check the current Crimpy Cycles
It is possible to check the number of remaining crimp cycles before the tool is due for service. With the tool powered off, perform the following steps to enter service display mode:
- Press and hold the Reset button (8).
- Press and hold the Start button (7).
- Continue pressing and holding both buttons until the Red and Green LEDs flash simultaneously.
- After releasing both buttons, the four green indicator LEDs (6) show the remaining crimp cycles Refer to the following table for their meanings.
- Exit service display mode, press the Reset or Start button.
| Description | Status LEDs | Number of crimp cycles remaining |
|---|---|---|
| 4 Indicator LEDs On |  |
25,000 to 20,000 crimp operations |
| 3 Indicator LEDs On |  |
20,000 to 15,000 crimp operations |
| 2 Indicator LEDs On |  |
15,000 to 10,000 crimp operations |
| 1 Indicator LED On |  |
10,000 to 5,000 crimp operations |
| 0 Indicator LEDs On |  |
5,000 to 500 crimp operations |
| 4 Indicator LEDs Flashing |  |
500 to 0 crimp operations |
Rennsteig’s official warranty policy is available here.